Thursday, 7 June 2012

Chocolate Bloom in Pictures

A few months ago we went to make moulded chocolates and discovered that some of our chocolate wafers had bloomed. The effect of the chocolate bloom was mainly the cloudy appearance which caused a slightly waxy texture on the outside, but otherwise the chocolate tasted fine. Not sure what exactly caused it in this case, but I imagine it may have been a mix of lower quality chocolate and temperature changes in the kitchen.


Friday, 25 May 2012

Lightly-Salted and Roasted Almonds (No Oil)

I was looking for a simple recipe for very lightly roasted almonds. One of my favourite almonds for snacking are the dry-roasted, salted almonds from Bulk Barn. What makes these almonds so great is that they are only lightly salted, unlike a lot of the canned almonds out there which can be overwhelmingly salty.

To recreate this recipe, I wanted something really quick and simple, with no oil or butter. I also didn't see the point of blanching almonds, because I feel like the skin holds a lot of flavour and texture for snacking.

What I came up with was a method simple enough that it can be done entirely to taste.


Roasted almonds on baking sheet
Almonds after roasting
The soaked almonds on the baking sheet


Ingredients

  • Raw almonds - as many as you want, though 4 cups will cover a standard baking sheet
  • Water
  • Fine sea salt
Directions
  1. Preheat the oven to 350 degrees.
  2. Take the almonds and place them in an appropriately-sized bowl.
  3. Add water to the almonds until the almonds are nearly, but not quite, covered.
  4. Add salt and mix with a soup spoon for about 45 seconds until all of the salt is absorbed and you have a fairly salty brine (I use roughly 1 tablespoon or more for 4 cups of almonds). Because most of the salt will drain away with the brine, don't worry about adding too much salt; it's better to err on the side of too much when you do this.
  5. Using a slotted spoon, scoop the almonds from the bowl and spread them evenly over a standard baking sheet.
  6. Roast the almonds in the oven for 18-22 minutes until the almonds turn from off white to a light golden colour (or however dark you like) stirring the almonds about halfway through.
  7. Take the almonds out of the oven and allow them to cool completely.

Monday, 9 April 2012

Recipe Review: Baked Cinnamon Bun Donuts

In this post I review a recipe for Baked Cinnamon Bun Donuts with Vanilla Cream Cheese Glaze from Averie Cooks (a.k.a. Loves Veggies and Yoga).

A few week ago I really had a craving for donuts and I was eager to try our recently-purchased Wilton Six Donut Pan. I recalled seeing a post on Averie Cooks for baked donuts, and I particularly liked the sounds of these ones, so I decided to give them a try. And the results were fantastic...

First off, they looked great. They took on an appealing golden colour on the outside, but keep in mind that the actual texture of the donuts are somewhat different from conventional fried donuts which have a crispier outside and a soft inside. These had a much more uniform texture throughout--not bad by any means, but just a noteworthy difference from fried donuts. Keep in mind these are substantially more healthy than the fried kind, especially in terms of fat content (see nutritional estimate further down).


They baked into very firm and dense, but also moist and cakey donuts that broke very nicely. 

Please ignore the horrible muffin top donut experiment in the background
The donuts had a decidedly subtle flavour. I used salt and I suggest using a touch more (3/4 teaspoon total) and I would also try a bit more cinnamon (3/4 teaspoon), as she suggested, for a bit more of a cinnamon spice punch. I would also consider adding nutmeg (about a 1/4 tsp) to give it a bit more of a familiar old-fashioned donut flavour.

The strong point for these donuts that really makes them outstanding is the icing. The icing is an amazingly smooth and sweet cream cheese icing with a fragrant cinnamon flavour and a hint of vanilla. The vanilla and cinnamon flavour and creamy texture of the icing compliments these donuts perfectly. If you're looking for something to do with any leftover icing, true using it in place of butter or cream cheese on a sweet cinnamon raisin bread or similar. Amazing!

I found that in making the icing you likely won't need both tablespoons of cream cheese (1.5 tbsps at most) and you'll need only a few drops of water/milk, if any. Try using a full teaspoon of vanilla instead of just 1/2 a teaspoon and you probably won't need to thin it anymore with water/milk or else it will be too runny. If the icing gets too runny, which it may, just add more icing sugar until you get the desired consistency.

Overall this is a great recipe for baked donuts. We also tried making the Baked Chocolate Peanut Butter Donuts with Vanilla Peanut Butter Glaze from Averie Cooks, which were good, but were trying to do a lot. Our preference is for the cinnamon version.

Nutrition and Calorie Breakdown

I was curious so I ran a quick estimate of the nutritional content of the donuts using Self Nutrition Data. All things considered, these are very healthy donuts. The donuts come in at slightly over 200 calories each with the icing, with only 3 grams of fat and 42 grams of carbs of which 26 are sugar. See nutrition facts below or click here to see the full nutritional profile. 

Using nutritional data from Tim Horton's, a comparable store-bought donut (I would use an old-fashioned glazed as a comparison) would be about 320 calories with 19 grams of fat. These "cake donuts" fall somewhere in the middle of the calorie range for donuts. The lowest calorie donuts are still the chocolate/maple/honey dip "yeast donuts" which each have 210 calories and only 8 grams of fat.

Nutrition Info for Baked Cinnamon Bun Donuts

Saturday, 10 March 2012

Ripening and serving pineapple

A good pineapple is truly amazing. In this post I'll explain what I consider to be the good and bad of pineapple, how to choose the best ones and how to ripen them. 

Living in Canada, I'm a bit geographically challenged when it comes to pineapples because they are typically shipped in from South and Central America (don't even get me started on the sustainability issues). So while I'll try to be general, I am speaking very much from a (northern) North American perspective.

To me, the ideal pineapple (see below) is one that is very ripe (but not overripened) with a very sweet scent and taste. A ripened pineapple typically looks a very deep bright golden yellow on the outside with a hint of orange or purple and a bit of green mixed in around the edges of the eyes. 


When buying a pineapple, I have found that the best ones are typically a little bit colourful, showing signs of ripening (orange and yellow) peaking through an otherwise green pineapple. It's important that the pineapple be as evenly coloured from one end to the other as possible. This is because the pineapple will ripen more evenly and consequently less of the pineapple will be pale, bland and acidic. The typical pineapple, when ripened, tends to be the most golden yellow in colour and sweetest in flavour near the base, gradually becoming more pale and bland towards the leaves. Don't worry if you don't have a perfectly even pineapple. They tend to be hard to come by and once you slice the pineapple into chunks and mix them all together, the sweet pineapples pieces and their juices will tend to balance out the less sweet ones.

Ripening a pineapple is fairly straightforward. I like to leave it on a countertop lying on its side to prevent mold and rot from developing around the base. Then you ripen it until it's a deep golden yellow like the one above. Some people say that the leaves should be dry and easily plucked out. Be careful not to overripen it as it can start to take on a fermented flavour or worse it can develop dark spots that might might need to be cut out or ruin the pineapple altogether. You can usually see the signs of overripening if you notice the uncut pineapple going from a golden yellow to an almost brownish maroon colour.

That's basically all there is to it. To slice a whole pineapple (see example below), lie it on its side and use a bread knife to cut off the top and the bottom. Then stand it upright and and cut the outer hull off from top to bottom in roughly eight even strips so as to not cut away too much of the pineapple meat. Cut the pineapple in half down the length of the pineapple. Take each of the halved pieces and cut them again in half lengthwise. With these quartered lengths of pineapple, carefully cut out the tough core by cutting down on a 45 degree angle from about an inch up the cut side of the pineapple. Finally, slice the pineapple to desired sized chunks and enjoy.

Some interesting ways to serve pineapple that I enjoy include with strawberries, plain yogourt, cinnamon, shredded coconut and even sea salt and cracked pepper (seriously, try it!).

How do you like to eat pineapple?


Saturday, 28 January 2012

Food and Cooking Workshop at the Brick Works (Toronto) - Feb 9

For anyone living in Toronto, a friend of mine is putting on a cocktail party cooking workshop at the Brick Works on February 9th where she will demonstrating how to prepare small Persian- and Pakistani-spice plates using ingredients from the Brickworks farmers market. The workshop runs on Thursday February 9 in the evening from 7-9pm and costs $55 per person (less if you buy a multi-class pack). For more information and to register for the workshop, visit Evergreen Brick Works "Green Bites Workshops".

From the Spice Spoon:
MY COOKERY WORKSHOP- FOOD IS LOVE: 
For my Canadian readers- I will be teaching a ‘cocktail party workshop’ at Evergreen Brickworks on February 9th, entitled: FOOD IS LOVE- based on my childhood memories. I’ll be teaching you how to create small Persian- and Pakistani-spiced plates, (a mix of vegetarian and non-vegetarian) influenced by the recipes I have inherited from the women in my family, while giving them a modern twist. Preparing Persian or Pakistani dishes can seem time-consuming and challenging, but they are not. Come and join us to prepare small plates using ingredients from our farmer’s market. I will also be preparing a fancy-coloured cocktail to pair with the treats. 
On the cocktail menu, there will be the following, for example: 
Pomegranate & Rosewater Essence Sparkling Wine Cocktail 
Saffron Chicken and Roasted Red Bell Pepper Brochette with a Cucumber Yoghurt Dip 
Farmer’s Cheese, Dried Cranberry, Walnut and Tarragon Tartine 
This is the link to sign up for my workshop.

Sunday, 15 January 2012

Variations of the Garden Vegetable Sandwich

This is the second post about our day trip to Buffalo and our visit to a US Tim Horton's. The other item we tried was the US Tim Horton's spin on the Garden Vegetable Sandwich. This is an item available at Tim Horton's in both Canada and the US (unlike the prized Peanut Crunch Donut) however, in my opinion, the Canadian version very clearly wins over the American one.

Total cream cheese overload...

The American version was rather disappointing for me. First of all, it had way too much cream cheese on it. I'm not sure exactly how much, but you'll see in the photo above that I managed to scrape off at least 2 full tablespoons of cream cheese (the bagels were huge) and there was still a more than reasonable amount left on the bagel. Also, the vegetables consisted of just shredded lettuce and a couple tomato slices--not even a cucumber! It was bit like a Burger King Whopper on a bagel without any meat and with cream cheese instead of Whopper Sauce. A Whopper might just have been better.

The Canadian version of the Garden Vegetable Sandwich, on the other hand, has full lettuce leaves and fresh cucumbers in addition to tomatoes. My preference is to have them with a bit of ranch sauce and sliced cheddar cheese instead of cream cheese. But it's actually such a simple sandwich that you can make them yourself at least as well, if not better.

Garden Vegetable Sandwich Variations

Take your favourite bagel and toast it. Throw on a couple slices of good cheddar cheese (I use an old or extra old white cheddar). Pile on a few fresh sliced cucumbers and tomatoes (and lettuce, optionally), season it with sea salt, freshly ground pepper and a light splash of olive oil and you have a perfectly simple and delicious sandwich. For another variation, try it with freshly sliced avocados as well.

These sandwiches also travel very well (we take them to work quite regularly). Be sure to wrap the vegetables separately in plastic wrap and place it at the bottom of the sandwich bag with the bagels and cheese on top (to prevent the vegetables from making a mess of the bagel).


Another simple variation is to make it a bagel and egg sandwich. For an easy "fried" egg, take a small glass dish (the flatter the bottom the better), lightly spray it with an oil spray, beat in one whole egg, add a touch of salt and pepper and top with freshly shredded parmesan. Microwave for 60-80 seconds and top with tomatoes and season with olive oil, salt and pepper.

Wednesday, 23 November 2011

Recreating the Tim Horton's (USA) Peanut Crunch Donut

On a day trip to Buffalo over the summer, we stopped at a Tim Horton's to grab a snack. What I learned was that while the Canadian and American Tim Horton's had many things in common, not everything was the same. Some things were better (as I'll explain below) and other things were considerably worse. I'll start off with the good and get to the bad later, in a subsequent post.

It was at this Tim Horton's (near the Buffalo airport--don't ask!) where I discovered the Peanut Crunch Donut. This donut is definitely not sold in any Canadian Timmy's I've ever visited--there's just no way I could have missed this donut. The donut is a simple but brilliant concept: an old-fashioned donut covered with a glaze and then doused with chopped peanuts. I like to think of it as a Payday bar crossed with an old-fashioned donut. With that image, I doubt I need to explain how this donut is now one of my favourites (though a baked peanut and chocolate donut just might beat that out).

Tim Horton's USA - Peanut Crunch Donut
This delicious donut posed a problem for me: how was I going to be able have this donut again upon returning home (and not having easy access to Buffalo)? I thought about petitioning Tim Horton's Canada to bring the Peanut Crunch Donut north of the border, but that could take months/years/never, and I want one here right now!
So I decided on a relatively simple solution. I would take a plain Tim Horton's Old Fashioned Donut, dip it in a donut glaze and then roll in it chopped peanuts. For the donut glaze, I adapted a recipe by Alton Brown from the Food Network website. My change to the glaze recipe was very small, but still important if you don't have experience making donut glazes (like me).

For the donut, any unglazed cake donut should work (e.g. old-fashioned or sour cream). With that said, I realize that not all donuts come unglazed, like many chocolate donuts for example. You could try experimenting using a pre-glazed donut, but you may make a bit of a mess of the old glaze and it might be tricky to get the new glaze to adhere. But just try it! Don't let my doubt stifle your innovation.

Matt's Almost-a-Peanut-Crunch-Donut


These donuts were a pretty big hit with my colleagues, who acted as willing taste testers.

My attempt at the Peanut Crunch Donut - not as pretty, but every bit as tasty
Ingredients
  • 6-8 Tim Horton's Old Fashioned Donuts (unglazed)
  • 1 1/2 cups of peanuts coarsely chopped as evenly as possible (see the exemplar donut above from Tim Horton's above, and not my version)
  • 1/4 whole milk
  • 1 teaspoon vanilla extract
  • 2 cups confectioners' sugar
  • Hot water (from the stove or microwave) for thinning the glaze - this wasn't in the original recipe but I found the recipe wouldn't have worked without it.
Directions

Before making the glaze, spread the chopped peanuts evenly over a piece of waxed paper. 

Combine the milk and vanilla in a saucepan and heat over low heat until warm. Gradually sift the sugar into the milk mixture, whisking gently and continuously, until well-combined. Remove the saucepan  from the stove and place in a bowl of warm-hot water so that just the base of the saucepan is submerged in the water. If the glaze is so thick that it is starting to harden in parts (as it likely will be), continue whisking it while very slowly dropping in hot water using a spoon until the glaze is just smooth without clumping or hardening as you whisk.

Now, take each donut and quickly dip it in the glaze on both sides and immediately roll each side of the donut and the edges in the peanuts. Repeat this process for each of the donuts. Pay close attention to the consistency of the glaze as you may need to whisk in a few drops from one donut to the next. If you find that the glaze goes on too thick and lumpy or the glaze doesn't adhere to the donut, you need to thin the glaze with hot water as described above.

And after you gorge yourself on several of these, you may want to detox yourself with a simple coleslaw from my previous post.

Thursday, 20 October 2011

A simple coleslaw, but better

I've always enjoyed the idea of coleslaw. Shredded cabbage with a light vinaigrette--simple, tasty and refreshing. But the toils of preparing it had always seemed too daunting to be worth the effort. Or, when I tried, the results were so bad I just gave up, like when I tried shredding cabbage by stuffing cabbage chunks into our food processor using the slicing disc attachment. Aside from all the work it took (i.e. prep, process, empty, clean), I would get unevenly shredded cabbage with big chunky pieces that I basically had to throw away. What's more, the dressing recipes I always seemed to try were too complex or overpowering to make a good coleslaw.

Me learning to make coleslaw
It turns out that I was trying too hard to make something extravagant out of something that wants to be plain and simple. This occurred to me during our trip to Serbia and Croatia this past summer, where my mother-in-law taught me an easier easier way to shred cabbage and prepare coleslaw. The technique is quite straightforward:
  1. Take a head of cabbage and peel off the top few layers of cabbage leaves, which effectively act as nature's packaging for the cabbage head. Rinse the cabbage head if you wish.
  2. Using a medium-sized utility knife (6" or so) cut the head of cabbage in half cutting from the top of the cabbage down to the root (i.e. lengthwise and not widthwise).
  3. Here's where it gets a bit awkward. You want to find a comfortable way to hold or brace the cabbage using your non-dominant hand so that you can use your dominant hand to shred the layers of cabbage over top a bowl. You can either stand and do this with a bowl on the counter, which takes a bit of work. Or, an easier way to do it is to sit in a chair with a bowl in your lap.
  4. To shred the cabbage you simply shave off layers of the cabbage at your desired thickness from the top of the cabbage down the sides, gradually moving inward and down the cabbage, while generally avoiding the tough root part.
Now for the dressing I was taught to use a light splash of vegetable oil, a generous amount of vinegar to taste, and salt and pepper to taste (sorry, I don't have any specific measures, you really just have to do this according to your own taste). I've found that using light rice wine vinegar (like Marukan's) in place of white vinegar creates a smoother and also sweeter flavour. I also use a spray can of oil to keep the oil to a minimum. A few shorts sprays is more than enough. I recommend adding salt last because the salt in the rice wine vinegar will lessen the amount you need to add afterwards.

Sunday, 2 October 2011

Random ingredient recipe: tomato peach and ginger salsa

The scenario: I had several pounds of ripe tomatoes from a local vegetable market in Bloor West Village and another couple pounds of ripe peaches from the Winona Peach Festival. We were heading to a friend's cottage for the Labour Day weekend and so I was thinking about some kind of party food. The idea of salsa first came to mind given the shear volume of tomatoes I had and I thought that the sweetness of the peaches would compliment the salsa nicely.


However, when I searched several recipe websites that I typically rely on, I came up empty. Then after a basic web search, I came across the exact recipe I was looking for. I followed the recipe almost exactly, except that I added about 2 teaspoons of fresh grated ginger for extra warmth which gave it a nice touch. I used about 4 dried red Thai chili peppers which worked quite nicely and gave it a medium spiciness overall. I also didn't use a food processor to mince the onions and peppers, but rather I diced them by hand.

This is an excellent recipe that makes a wonderful, fairly thick and chunky style salsa (see above). I did not can this for long-term storage however if you're a experienced at canning, you certainly could. Here is the complete recipe for Tomato Peach and Ginger Salsa adapted from the blog "A Handmade Life" with my comments and additions in italics:


Tomato Peach and Ginger Salsa

  • 3 1/2 pounds ripe, Roma tomatoes (blanch, peel, and chop)
  • 1 1/2 pounds peaches  (peeled and chopped)
  • 3 large bell type peppers diced
  • several hot type peppers (maybe 6 jalapeno type then add more depending on your taste - I used 4 dried hot Thai chilies which worked perfectly)
  • 1-2 large onions diced
  • fresh minced garlic (1 head is nice but can use less)
  • 2 tsp grated ginger
  • 1 small can tomato paste
  • 3/4 cup white vinegar
  • 1 tbsp coarse salt
  • 2 tsp paprika (optional -- I included paprika)


Place all ingredients in a large pot.  Bring to a boil uncovered and then turn down heat and simmer for 1 hour.  Keep an eye on it and stir every so often otherwise it can burn on the bottom as it thickens.

Tuesday, 6 September 2011

Random ingredient recipe: Avocado banana and mango smoothies

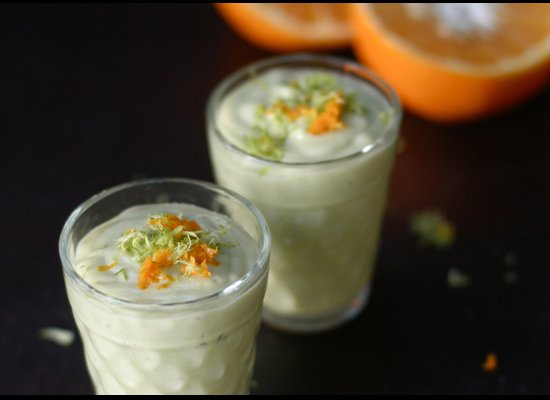
I had heard of avocado milkshakes and smoothies before, but it never occurred to me to try making one until the other day. Basically, I came across an article in the Huffington Post called "8 Great New Avocado Recipes". Included in it was a recipe for avocado-banana smoothies that, I had to admit, sounded intriguing and looked even better in pictures (below).

Avocado-banana smoothie done my way (see below)

Source: Huffington Post Canada

And, as it happened, I had several very ripe avocados and bananas at home. But alas, I was looking for something simpler than the recipe above because I really wanted to get a feel for what avocados taste like in a smoothie. Conveniently, I didn't have any fresh ginger on hand so it seemed like that recipe and I weren't meant to be--at least not today.

That's when I came across this recipe that was much closer to what I had in mind. It's simple and it really places the flavour of the avocado front and centre. I modified the recipe slightly by adding some fresh mango, an extra 1/4 of milk and using only an 1/8th of a cup (or 2 tablespoons) of sugar instead of 1/4 cup. I also used half the ice (blender issues--don't ask!) and spiced it up just a little with some cinnamon and nutmeg (see below).

It took me several tries and and I had to consume several large glasses of this stuff to get it just how I wanted it. So, to create my version of this recipe, just throw all of these ingredients into a blender and blend until smooth and creamy:
  • 1 ripe avocado (soft and dark when ripe but not so ripe that it feels bubbly--this usually means it's overripened)
  • 1 ripe banana - frozen can work too
  • 1 small ripe mango diced
  • 1 tsp vanilla extract
  • 3/4 cup of milk (I've used both soy and 1%, both of which worked fine)
  • 2 tablespoons of sugar
  • 1 cup of ice
  • 1 tablespoon of shredded unsweetened coconut (toasted would be a nice touch if you've got it)
  • Cinnamon and nutmeg to taste (approx. 1/2 tsp and 1/8 tsp respectively)
You can dust it with cinnamon as I did above or leave it naked, but to be perfectly honest, aside from presentation, it really doesn't add much to it. Try adding fresh grated ginger for a spicier twist, as suggested in Marcus Samuelsson's recipe noted above. It's a pretty basic recipe and it's easy to play with the proportions or ingredients to customize it to your own personal taste.

    Monday, 15 August 2011

    I love melons!

    IMHO, there is nothing better on a hot, summer day than a piece of cold, juicy watermelon. Think about having a picnic/BBQ outdoors and what else comes to mind for picnic fruits than watermelon! Melons, in general, are underrated. They get a bad rap (see below).


    But I love melons, in particular cantaloupe and watermelon. As a kid, I hated cantaloupe. My Mother, who was/is obsessed with fruits of all kind, would force my brother and I to eat it. I always found the flavour gross, the texture unappealing.

    However, in the past few years, my taste buds have matured and I've come to love cantaloupe. To me, it's the most "cake-like" of fruits; the texture is more substantial then say, a strawberry and less crunchy than an apple but it's soft-ish and has a mild flavour. It doesn't make my mouth pucker like a tart berry or get stuck in between my teeth like the skin of an apple. It's like the vanilla cake equivalent in the fruit world. Great on its own or pair with something else more flavourful for a kick (like coconut or booze in a fruit salad or cheese and prosciutto like at Vertical in Matt's post below).

    I also find it very filling, so a cup of diced cantaloupe will keep me full much longer than a cup of raspberries or a bunch of kiwi for example.

    Watermelon has always been a favourite. I have fond memories of being a kid, sitting on the front step of our house, playing "Trouble" with my cousins and eating slices of watermelon. It's synonymous with summer and it is certainly best served super chilled.

    Granted, you have to eat melons when they're perfectly ripe. Overripe melons can have an awful texture and taste grainy which is not good for anyone but that's true of any fruit, am I right?

    Mind you, there is a hierarchy in the melon world and it goes something like this: watermelon, cantaloupe, everything else. Honeydew is gross; at least that's something Matt and I can agree on.

    Tuesday, 9 August 2011

    I can't stand: melon, honeydew, etc.


    My fruit salad nightmare at a well-known breakfast chain

    Mostly-eaten prosciutto, melon and mint from Vertical
    I know I'll probably offend a few people saying this, but, with few exceptions, I dislike most melons, cantaloupes, honeydew and related fruit. It's probably because I have a general aversion to bland, flavourless and excessively watery fruits (fruit, in the culinary sense), something I feel these fruits are prone to be. I much prefer fruits that have some bite, some pucker, some flavour. One of my greatest fears when I order fruit salad is that it will be 90%+ melons, honeydew and watermelon.

    One of the exceptions I make are for melon and prosciutto combinations. I particularly like the thinly-shaved melon with prosciutto and mint from Vertical Restaurant (see above).

    The other exception I have made occurred when I was in the south of Spain. Honestly, I don't understand why they're so much tastier there, but they just were. In my limited experience, cantaloupes in Spain were a deep and appealing orange colour, pleasantly sweet, a bit tart and overall very flavourful and delicious. I have yet to find anything like these back home. If there's anyone out there who's found ones like this, in the Toronto area, please tell me where.

    Friday, 15 July 2011

    Ice cold chocolate

    A fresh-from-the-freezer Reece Peanut Butter Cup

    Mars and Snickers bars "available chilled" at a local sporting event

    I like my chocolate ice cold. There's something I just enjoy about the crisp, crunchy snap of chocolate fresh from the fridge (or occasionally the freezer). Obviously, not all chocolate does cold well. The best candidates I've found for the fridge are things like Reece Peanut Butter Cups or Bars (but not Pieces), Kit Kat, Green and Black's White Chocolate and other things that are covered with or made entirely of relatively thin milk or white chocolate. I'm also told that freezing York Peppermint patties (but apparently not Pep) yields an amazingly refreshing treat. Dark chocolate and thicker milk chocolate can also be chilled as long as it's done carefully as they can become quite brittle. Even some chocolate bar makers are merchandising their products cold (see banner above for Mars and Snickers "available chilled" at BMO Field).

    Although some say that refrigerating chocolate can result in so-called "chocolate bloom", I've rarely encountered this problem myself and tend to believe it's more the result of a quality issues with the chocolate. So if you haven't already, I recommend trying your favourite chocolate straight from the fridge, especially during the summer when chocolate is prone to melting.

    Tuesday, 14 June 2011

    No new posts until July


    We're on an family trip for a few weeks where we'll be enjoying the gastronomy of Croatia and Serbia. We're doing our best to document the food and drink experience on the way so we'll have lots of interesting ideas to share when we return.
    Until then!

    Thursday, 9 June 2011

    Random ingredient recipe (and low-carb idea): Cauliflower straciatella soup

    Last night our fridge was empty, save a few random items. We had several heads of cauliflower, a half dozen eggs and a variety of cheeses including a Pecorino-Romano. In the freezer we had an open one litre container of chicken stock. For reasons I cannot explain, when confronted with a random assortment of ingredients like this, I've been known to dream up some peculiar recipe ideas. Behold my Cauliflower Straciatella Soup! (Please scroll down to see my approximate preparation instructions)


    What you'll need:
    • 1 medium-sized head of cauliflower, crumbled (see note below)
    • 4 cups of chicken broth
    • 3 cups of water
    • nutmeg to taste
    • 4 eggs, beaten
    • dried parsley flakes or fresh Italian flat leaf parsley, to taste
    • about 3/4 cup of loosely-packed shredded pecorino-romano cheese, or to taste
    • salt and pepper
    Note about crumbled cauliflower: Crumble the cauliflower with your hands as best you can until it resemble a very coarsely crumbled feta (very small chunks). Because we're going for the coarse crumbled texture of the florets, set aside any excess stalk or stems as you do this (save them for a veggie stock or for steaming as a side if you like).

    Put the stock, water, cauliflower and nutmeg in a large stock pot and bring to a boil.  Once boiling, pour in the beaten eggs and use a fork to quickly stir the egg mixture up in the pot and spread it evenly throughout the soup. Add the parsley. Lower the heat slightly to a brisk simmer (medium-high heat) and continue to cook for approximately 15 to 20 minutes, until the cauliflower become soft but not mushy. Remove from heat. Sprinkle or shred in the pecorino romano and season with salt and pepper to taste.

    With this recipe I discovered that cauliflower, nutmeg and sharp cheese happen to complement each other quite nicely, based on a suggestion from one of my new favourite books, The Food Thesaurus. With that said, I will admit that judged solely based on it aroma, most people would likely pass over this soup. Cauliflower and sharp cheese are both rather strong smelling ingredients, but when it comes to flavour, there's something about this mixture of ingredients that just seems to work.

    Personally, I love it; Nat has yet to try it.

    Wednesday, 8 June 2011

    Boiling Corn

    One thing Matt and I can both agree on is corn. Sweet, sweet corn. It's so tasty and we have both been known to eat an entire can of corn in one sitting (well, maybe that's just me).
    Corn for dinner
    We even agree on the best method to cook corn - boiling water on the stove. This will be a rare occasion folks, our agreement. So in celebration of that, we've decided to indulge a bit tonight and are having us some corn with dinner!

    Apparently there is quite a debate on how long corn needs to be boiled. Some say that you should put the corn in at the beginning, allow the water to boil then cook the corn for a few minutes. Others prefer to boil the water first, throw in the corn and cook for up to 7 minutes. We've decided on the former and will let the corn come to boil and then we'll watch it for a couple of minutes.

    Needless to say, I'm very excited. Neither of us had corn in a long time and this is actually the first time that either of us have cooked it without a parent (Matt's Dad cooked their corn and my Mom cooked our corn in the family).

    We even learned a new method to butter your corn! You can butter a piece of bread and then roll the ear of corn across the buttered slice and voila! Perfectly buttered corn without the hassle!

    What we will learn on the internet next?!

    Nat

    Sunday, 5 June 2011

    The curiously misshapen tomato

    The envy of all other tomatoes
    Nat and I were recently at a local Sobey's when we came across this most curious tomato. Now if a tomato could have a machismo complex, this tomato would have it bad. Rather than leave it to waste away in the grocery store, we bought it, fully intent on eating it. In fact, it tasted perfectly normal and made a great addition to our lunch time sandwiches. We decided to not document the tomato's disassembly and dismemberment, nor did we eat the growth, in part because it had grown moldy by the time we sliced it.

    For the record, neither the tomato nor the picture was modified by us in any way. This tomato was exactly how we found it, in all its glory and exactly as nature intended it. As well, for those who may have wondered, the tomato was definitely not an heirloom tomato (but I would assume GMO?). And no, your eyes are not deceiving you, the growth is in fact shriveling, something that increased as time wore on.

    Saturday, 4 June 2011

    What to expect

    I'm Matt, the other half of A Matt or Nat of Taste (AMNOT--appropriate acronym?). Throughout AMNOT we will talk at lengths about food and drink. Occasionally we may digress and discuss other things, but we will strive to keep it food and drink focused. To do this, we will share our ideas and opinions--with pictures and recipes/ preparation instructions wherever possible--about the things we love, like or hate to eat.

    Our food ideas will range from simple to complex and conventional to peculiar. Typically, these ideas will be my own, with Nat providing her own commentary. At times we will agree, but more often than not we will disagree.

    Just a few ideas for posts we have in mind include:
    • Cold/frozen chocolate
    • Ripened and seasoned pineapple
    • Raw broccoli
    • Misshapen tomatoes (that aren't heirloom)
    • Beer cocktails
    More than anything, our goal is to chronicle our food adventures and have fun along the way. We hope you enjoy it and encourage you to rate our ideas and provide comments and ideas of your own.

    Friday, 27 May 2011

    Welcome!

    Welcome to A Matt or Nat of Taste! This blog is basically a chronicle of two people's disagreements over food and other matters of taste. I'm Nat, one half of the blog.

    It's currently pretty ugly, so stay tuned for a small redesign before a full blown launch.

    Web design is not an area where I trust Matt's taste. He has an inexplicable love of beige.

    xoxo
    Nat